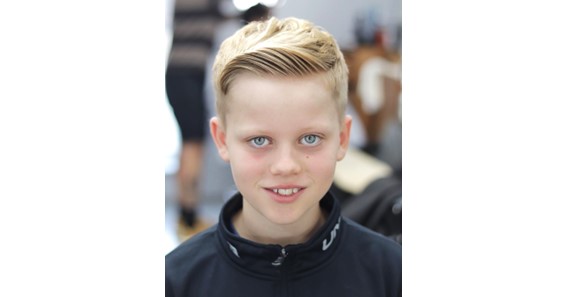
If you are that parent or guardian that loves enjoying every moment with your little man, you can also have the pleasure of cutting his hair. Doing your boys haircuts is easy and the best way to save money if you are working on a budget. It also saves you the trouble of visiting a barbershop whenever your baby needs a haircut, as it can be done from home.
Getting a haircut is not as complicated as it may sound to be. As long as you have the right tools and know what you are looking for as the end result, you can easily come up with any haircut. There is also nothing wrong with having a guide with you to help you with every step of the process. Below is a step-by-step guide on how to do your boys haircuts by yourself.
-
Step One
You first need to decide on an attachment and start working from the back of your son’s head. Carefully work your way to the top, where the head is rounded.
For a closer trim when doing your boys haircuts, you need to lean chin to chest. This also helps you get any tapered effect that you may be looking for.
When doing the first cut, you also need to put factors such as the length of hair you want to be left from the scalp. You also need to consider the hairstyle you are going for and how to achieve the different lengths required if necessary.
You need to figure out if you need to leave long hair on the top rather than on the sides and how to create a perfect fade before you start trimming.
As you try to achieve different lengths as required, holding the child’s head with one as you do the trimming with the other to prevent too much movement is important. It is important to cut when the head is straight to avoid missing the required angles for the final finish.
-
Step Two
The second step is much more a continuation of the first step. You need to continue working on the trimming, which is the basic step all around the head.
This step requires you to change the clippers to a different number, preferably smaller, for a more defined trimming. If you want to maintain one length throughout the head for your boys haircuts, changing the clippers number won’t be a necessary step.
-
Step Three
Once you are done working all around the head of your little man, the next important part will be working on the front part, beginning from the hairline towards the top and finally to the back of the head.
When doing the cutting, it is important to cut the hair towards the direction it is grown. This is important, especially for the topmost part of the head that is likely to have hair grown in different directions.
Once you are done dealing with the top part of the head, you also need to consider going back to check out for any missed spots.
-
Step Four
In the case where you are going for a longer length on the top, you should be careful to blend in the two parts perfectly. If you are a beginner, it is advisable to use different clipper numbers and if you are a professional using a comb is enough.
Continuously repeat the process until you are satisfied with the fade that comes up. Always start the trimming at a longer length to give room for adjustments. Repeatedly defining the fade by passing the clippers over as many times as you create the perfect blending effect.
-
Step Five
The last thing you need to do to consider the cutting complete is to remove the attachment to leave room for hairline and neck detailing. The detailing should not go too short, and it is advisable to leave them a bit longer because they will automatically look shorter after the cut.
You can then proceed and wash your complete boys haircuts as the final step. You can use any hair products of your choice for styling.
